
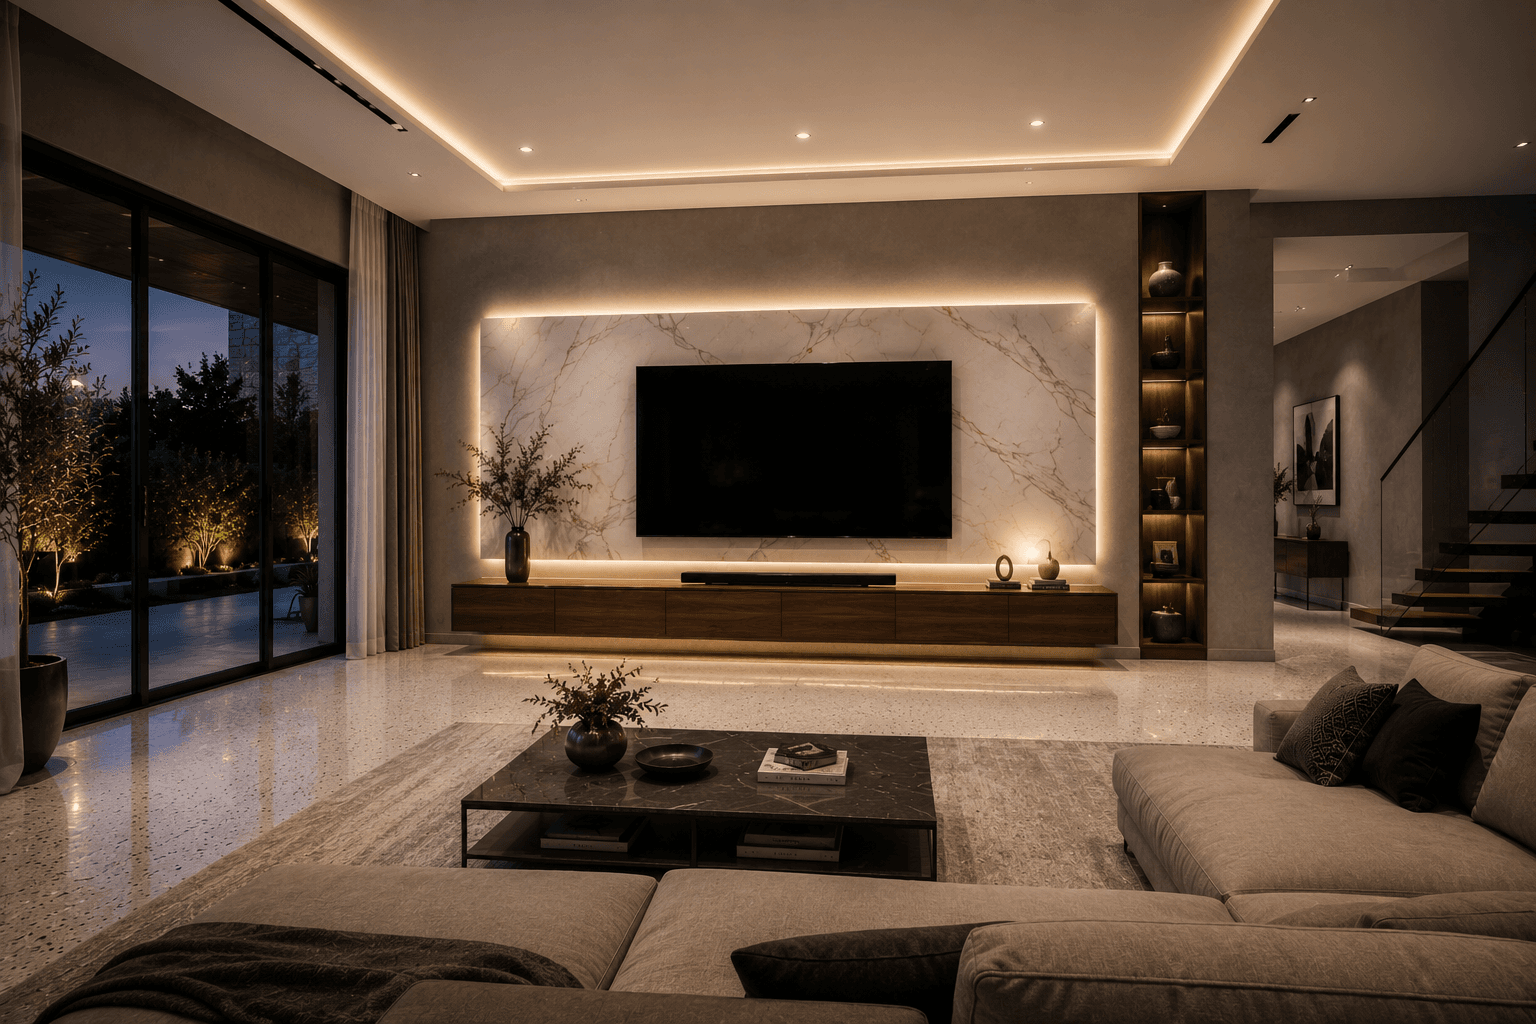
A floating calacatta panel with a warm LED halo, flush TV, walnut console and lit display niche — this media wall treats television as architecture, not appliance.
The idea behind it
The design solves the eternal TV problem by surrounding the black rectangle with the room's most luminous material. When the screen is off it reads as negative space in a marble composition; when it is on, the halo light behind reduces eye strain and deepens perceived contrast.
Symmetry is deliberately broken once: the lit walnut niche column sits to one side only, keeping the wall from feeling corporate. Every other element — console, halo, downlights — holds a strict grid, which is why that single asymmetry feels styled rather than accidental.
What you will need
Marble or porcelain slab panel, Calacatta-style white slab with gold veining, sized past the TV on all sides
Recessed LED halo channel, Warm-white strips in a shadow gap framing the entire panel
Floating walnut media console, A long wall-hung unit with push-open doors and hidden cabling
Lit display niche, A walnut column of shelves with integrated shelf lighting
Greige modular sofa, Deep corner seating that wraps the viewing zone
Black marble coffee table, A slim dark counterpoint to the pale feature wall
Dimmable ceiling cove, Perimeter LED tray lighting for cinema-mode evenings
Steal the look
Step 1
Frame a stud build-up on the media wall deep enough for cables, mounts and the recessed LED reveal.
Step 2
Fix the marble or porcelain slab centrally, leaving a consistent 3-5cm lit shadow gap on all four sides.
Step 3
Install warm-white LED strip in the gap and in the ceiling cove, wired to separate dimmers.
Step 4
Mount the TV flush on the slab with an in-wall cable route down to the console position.
Step 5
Hang the walnut console below, aligned to the slab's width, and add a slim soundbar on top.
Step 6
Build or fit the lit walnut niche column to one side and style it sparsely with ceramics and one plant.
Step 7
Arrange the greige modular sofa and black marble table facing the wall, and finish with pin-spot downlights on dimmers.
Perfect for
- Movie-first households that want luxury without a dedicated cinema room
- Open-plan spaces where the media wall is visible from the kitchen and hall
- Fans of hotel-suite calm and hidden-cable minimalism
- New builds and renovations where a stud build-up is easy to add
Avoid if
- You rent or cannot alter walls — this look depends on built-in depth
- Your room needs bookshelf-style storage more than display
- You prefer cosy, cluttered character over sleek surfaces
Estimated budget
Budget
Marble-effect large-format porcelain or laminate panel, self-fit LED kit, flat-pack floating console in walnut foil and careful DIY cable management.
$800-$2,000
Mid-range
Genuine porcelain slab professionally installed, custom LED reveal, walnut-veneer console and niche, and an electrician-wired dimming scheme.
$2,000-$6,000
Luxury
Book-matched natural calacatta stone, bespoke walnut joinery wall, integrated architectural lighting control and in-wall speaker system.
$6,000+
Colour palette6 tones
Calacatta White
feature slab
#EDE8DF
Gold Vein
stone veining and glow
#B99B62
Warm Walnut
console and niche
#6B4A2F
Greige Linen
sofa
#B7AEA2
Terrazzo Pearl
flooring
#DDD8CE
Ink Marble
coffee table
#232323
Frequently AskedQuestions
A stud build-up carries a marble or porcelain slab panel set proud of the wall, with a recessed perimeter channel holding warm LED strips. The TV mounts flush to the slab and all cabling runs inside the build-up to the console below.
Large-format porcelain slabs are lighter, cheaper, easier to mount on stud walls and nearly indistinguishable at viewing distance. Real book-matched stone wins on uniqueness, but porcelain is the smarter choice for most homes.
Warm white in the 2700K-3000K range flatters gold-veined stone and reads as cosy rather than commercial. Avoid cool white, which turns marble grey and makes the living room feel like a showroom.
Join the conversation
Share your thoughts on this room.